DIY Home Security: Build a Smart System Under $200

Building a smart home security system under $200 is achievable with DIY solutions. This guide provides a step-by-step approach to selecting affordable components, setting up your system, and enhancing your home’s security without breaking the bank.
Want to protect your home without spending a fortune? This guide shows you how to build a smart home security system for under $200: A step-by-step DIY guide. It’s easier than you think!
Getting Started: Assessing Your Security Needs
Before diving into the world of DIY home security, it’s essential to understand your specific needs. Every home is unique, and a cookie-cutter approach simply won’t cut it when it comes to security. Take the time to evaluate your property and identify potential vulnerabilities.
Start by walking around your home, both inside and out, and making a list of areas that could be targeted by intruders. Consider factors such as the location of windows and doors, the presence of shrubbery that could provide cover, and the overall layout of your property.
Identifying Vulnerable Points
Certain areas of your home are naturally more vulnerable than others. These are the spots you’ll want to focus on when designing your security system. Here are some common weak points to consider:
- Front Door: The most common entry point for burglars.
- Back Door: Often less visible and therefore a tempting target.
- Ground-Floor Windows: Easy to access and often overlooked.
- Sliding Glass Doors: Can be pried open relatively easily.
Defining Your Security Goals
Once you’ve identified potential vulnerabilities, it’s time to think about what you want your security system to accomplish. Are you primarily concerned with deterring burglars, or do you also want to be alerted to other threats, such as smoke or flooding? Having clear goals will help you choose the right components and features for your DIY system.
Some common security goals include:
- Deterring potential intruders
- Receiving real-time alerts of suspicious activity
- Monitoring your home remotely while you’re away
- Having video evidence in case of a break-in
By understanding your specific security needs and goals, you can create a DIY system that provides the right level of protection for your home and peace of mind for you and your family. Consider also whether you need indoor monitoring or only exterior coverage.
Choosing the Right DIY Components Under $200
Now that you know your security needs, it’s time to select the components for your DIY system. The good news is that you can find a wide range of affordable and effective devices that won’t break the bank. The key is to prioritize the features that are most important to you and to choose products that are reliable and easy to use.
When selecting components, consider factors such as the quality of construction, the ease of installation, the compatibility with other devices, and the availability of customer support. Read reviews and compare prices before making a purchase.
Essential Components
These are some of the essential components that you’ll need to build a basic DIY security system:
- Smart Hub: Acts as the brain of your system, connecting all of your devices and allowing you to control them from your smartphone.
- Door/Window Sensors: Detect when a door or window is opened, triggering an alarm or sending you an alert.
- Motion Sensors: Detect movement in a room or area, providing an extra layer of security.
- Indoor Camera: Allows you to monitor your home remotely and record video footage.
Recommended Affordable Brands
Several brands offer affordable and reliable DIY security components. Ring and Wyze are especially popular if you intend to integrate many cameras. Here are a few recommendations:
- Wyze: Known for its budget-friendly cameras and sensors.
- Ring: Offers a wide range of smart home security products, including doorbells, cameras, and alarms.
- Blink: Specializes in wireless security cameras that are easy to install and use.
With careful planning and the right components, you can build a complete and effective smart home security system for under $200. Make sure the chosen components can communicate and work together, or you may wind up with separate, non-integrated systems.

Setting Up Your Smart Hub and Connecting Devices
The smart hub is the heart of your DIY security system, so setting it up correctly is crucial. This device connects all of your security components and allows them to communicate with each other, as well as with your smartphone. Follow the manufacturer’s instructions carefully, and be patient as you go through the setup process.
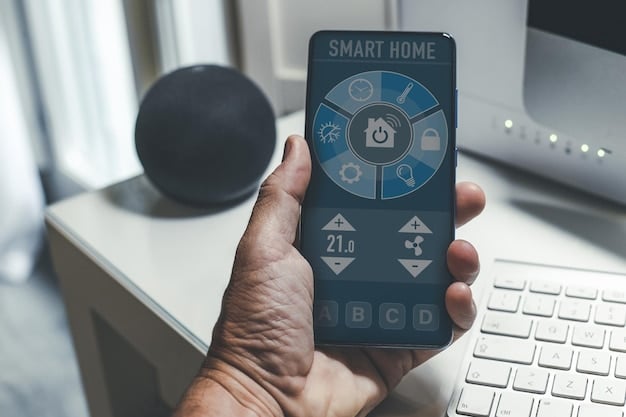
Most smart hubs connect to your home Wi-Fi network, so make sure you have a strong and stable connection before you begin. You’ll also need to download the hub’s corresponding app to your smartphone, which you’ll use to configure the system and control your devices.
Step-by-Step Setup Guide
Here’s a general overview of the setup process:
- Connect the smart hub to a power outlet and your router.
- Download the hub’s app to your smartphone and create an account.
- Follow the app’s instructions to connect the hub to your Wi-Fi network.
- Add your security devices to the hub, following the app’s instructions.
Pairing Devices to the Hub
Once your smart hub is set up, you’ll need to pair your security devices to it. This process typically involves pressing a button on the device or scanning a QR code with your smartphone. The app will guide you through the steps, and it should only take a few minutes to pair each device.
Make sure to test each device after pairing it to ensure that it’s working correctly. Open and close doors and windows with sensors attached, walk in front of motion sensors, and check the video feed from your indoor camera. It’s essential to verify that everything is working as expected.
A properly configured smart hub is the foundation of a robust DIY security system. Take your time, follow the instructions carefully, and don’t hesitate to consult the manufacturer’s support resources if you run into any issues.
Placing Sensors and Cameras for Optimal Security
The placement of your sensors and cameras is critical to the effectiveness of your DIY security system. Even the best components won’t do much good if they’re not positioned correctly. Take the time to carefully plan the location of each device, considering factors such as coverage area, visibility, and potential blind spots.
When placing sensors, focus on entry points such as doors and windows, as well as areas that are likely to be targeted by intruders. For cameras, prioritize areas that provide a clear view of your property and that are less likely to be obstructed by obstacles.
Best Practices for Sensor Placement
Follow these best practices when placing your sensors:
- Place door sensors on both the door frame and the door itself.
- Place window sensors on the window frame and the window sash.
- Position motion sensors in corners or along walls to maximize coverage.
Optimal Camera Locations
Consider these locations for your indoor and outdoor cameras:
- Front Door: To capture footage of anyone approaching your home.
- Back Door: To monitor a less visible entry point.
- Living Room: To provide a wide-angle view of your main living area.
- Hallway: To capture footage of anyone moving through your home.
Proper placement of sensors and cameras significantly enhances your security. Consider angles of visibility, weather conditions, and potential obstructions that could impede the sensors’ functionality.
Customizing Your Security Settings and Notifications
Once your security components are in place, it’s time to customize your settings and notifications. This is where you can fine-tune your system to meet your specific needs and preferences. Most smart hubs and security apps offer a wide range of options, allowing you to create custom alerts, schedules, and automations.
Take the time to explore the settings menu and experiment with different options to see what works best for you. You can adjust the sensitivity of your motion sensors, set up custom alert tones, and even integrate your security system with other smart home devices.
Setting Up Custom Alerts
Custom alerts are a great way to stay informed about what’s happening in your home, even when you’re away. You can set up alerts to be sent to your smartphone via push notification, email, or text message.
Some common alert configurations include:
- Alerts when a door or window is opened.
- Alerts when motion is detected.
- Alerts when the camera detects movement.
Creating Schedules and Automations
Schedules and automations can make your security system even more convenient and effective. You can set up schedules to arm and disarm your system at certain times of day, or you can create automations that trigger certain actions based on specific events.
Examples of useful automations include:
- Turning on the lights when motion is detected.
- Locking the doors when the system is armed.
- Sending a notification if the temperature in your home drops below a certain level.
Testing and Maintaining Your DIY Security System
After setting up your DIY security system, it is crucial to test all components and establish a maintenance routine. Testing ensures the system actively detects and responds to breaches, while regular maintenance guarantees its prolonged effectiveness.
Start by testing each sensor and camera individually. Activate door and window sensors to verify alerts. Check motion sensors by walking in their range. Review camera footage and angles for clarity and coverage, adjusting as needed.
Regular Testing Procedures
Incorporate a regular testing schedule into your routine:
- Weekly: System test, ensuring all devices respond swiftly.
- Monthly: Battery checks, replacing them as needed to prevent system failures.
- Quarterly: Update software and firmware to patch vulnerabilities.
Troubleshooting Common Issues
Even with proactive care, issues can arise:
- Lost Connection: Restart the hub and check Wi-Fi.
- False Alarms: Reduce sensor sensitivity.
- Camera Disruptions: Reposition for better signal.
Continuously testing and maintaining your DIY security system will safeguard your home against potential intrusions. By testing regularly and following a maintenance schedule, you ensure your system is always ready. If issues arise, troubleshoot promptly to secure your home environment.

| Key Point | Brief Description |
|---|---|
| 🏠 Needs Assessment | Identify vulnerabilities in your home before you start. |
| 💰 Budget Components | Choose affordable but effective DIY security components. |
| ⚙️ System Setup | Configure smart hub and connect all security devices. |
| 🚨 Testing & Maintenance | Regularly test and maintain your DIY security system. |
FAQ
▼
Yes, with careful planning and by choosing affordable components such as Wyze or Ring products, you can create a functional security setup within budget. Focus your spending on essential devices like sensors and cameras.
▼
The essential components include a smart hub to connect all devices, door/window sensors for detecting entries, motion sensors for detecting movement, and an indoor camera for remote monitoring.
▼
For sensors, prioritize entry points such as doors and windows. Cameras should be placed to maximize visibility, covering front and back doors, hallways, and main living areas, avoiding obstructions that could create blind spots.
▼
Maintenance includes weekly system tests, monthly battery checks, and quarterly software updates. Also, regularly check the connection status of all devices to ensure everything is functioning correctly and promptly address any issues.
▼
For false alarms, adjust the sensitivity of your sensors. For connectivity issues, restart your smart hub and check your Wi-Fi connection, ensuring a strong and stable signal. Reposition cameras and sensors if necessary.
Conclusion
Building your own smart home security system for under $200 is not only possible but also empowers you to take control of your home’s safety. By carefully selecting components, optimizing placement, and staying proactive with maintenance, you can create a system that offers peace of mind without breaking the bank.


