DIY Bathroom Renovation: Save $2,000 with Expert Tips

DIY bathroom renovation offers significant savings, potentially cutting costs by $2,000 or more by handling demolition, tiling, painting, and plumbing tasks with expert guidance.
Embarking on a DIY bathroom renovation can be a rewarding experience, not just in terms of the personal satisfaction gained but also financially. With careful planning and execution, homeowners can potentially save upwards of $2,000 by tackling the project themselves.
Planning Your DIY Bathroom Renovation
Before you even think about picking up a hammer or wrench, meticulous planning is crucial for a successful and cost-effective DIY bathroom renovation. The planning phase sets the foundation, preventing costly mistakes and ensuring a smooth workflow.
Assess Your Current Bathroom
Start by thoroughly assessing your existing bathroom. Identify what you like and dislike, what needs to be replaced versus what can be repurposed, and any underlying issues like leaks or mold.
Set a Realistic Budget
Determine a feasible budget for your DIY bathroom renovation. Research material costs, tool rentals, and potential unforeseen expenses. Be realistic and allocate funds for unexpected issues that might arise during the renovation process.
- Create a detailed spreadsheet outlining all anticipated costs.
- Compare prices from different suppliers to find the best deals.
- Factor in a contingency fund for unexpected expenses (at least 10% of your total budget).
Proper planning is the cornerstone of a successful DIY bathroom renovation. By carefully assessing your current bathroom, setting a realistic budget, and creating a detailed design plan, you’ll be well-prepared to tackle the project.
Essential Tools and Materials
Having the right tools and materials on hand is paramount for a smooth and efficient DIY bathroom renovation. Gathering all necessary items before starting the demolition will save time and prevent frustrating delays.
Demolition Tools
Demolition can be a messy but necessary part of a bathroom renovation. Ensure you have the appropriate tools for safe and efficient removal of old fixtures, tiles, and drywall.
Installation Tools
Installing new fixtures, tiles, and plumbing requires specialized tools. Investing in quality installation tools will ensure professional-looking results and prevent damage to your new materials.
- Safety Glasses: Protect your eyes from debris and chemicals.
- Gloves: Protect your hands from rough materials and potential cuts.
- Respirator: Protect your lungs from dust and fumes.
Equipping yourself with the essential tools and materials is a crucial step in preparing for your DIY bathroom renovation. Investing in quality tools and prioritizing safety will contribute to a smoother and more successful renovation process.
Demolition: Proceed with Caution
Demolition is often the most physically demanding part of a DIY bathroom renovation. It’s crucial to proceed with caution to avoid injuries and prevent damage to surrounding structures.
Safety First
Before you start swinging a hammer, prioritize safety by wearing appropriate protective gear, including safety glasses, gloves, and a respirator.
Protect Existing Structures
Carefully protect existing structures that you intend to keep, such as adjacent walls, floors, and plumbing lines. Use drop cloths and masking tape to prevent scratches and dents.
- Turn off the main water supply to prevent flooding.
- Disconnect all electrical circuits to avoid shocks.
- Carefully remove fixtures, tiles, and drywall, minimizing dust and debris.
Demolition is a crucial phase in a bathroom renovation, and approaching it with caution and proper safety measures is paramount. Protecting yourself and the surrounding structures will ensure a smooth transition to the next phase of the project.
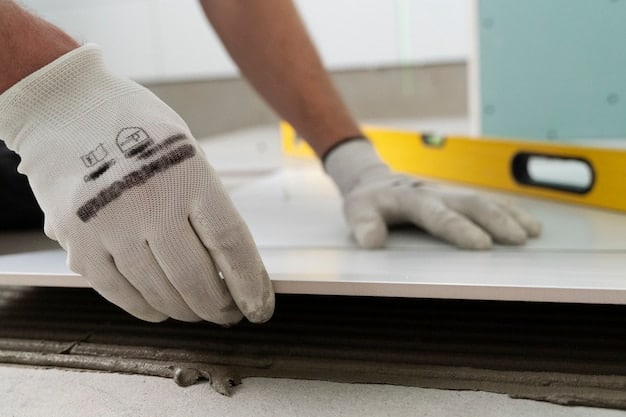
Tiling Like a Pro
Tiling is a skill that requires patience and precision, but with some guidance, you can achieve professional-looking results in your DIY bathroom renovation. Proper preparation and technique are key to a successful tiling project.
Surface Preparation
Ensure the surface is clean, level, and free of any debris. Patch any holes or cracks and apply a waterproofing membrane to prevent moisture damage.
Laying the Tiles
Use a notched trowel to apply thin-set mortar evenly to the surface. Press the tiles firmly into the mortar, using tile spacers to maintain consistent grout lines.

- Choose the right type of tile for your bathroom (ceramic, porcelain, or natural stone).
- Plan your layout carefully to minimize cuts and waste.
- Use a wet saw to make clean and precise cuts.
Mastering the art of tiling is essential for achieving a polished and professional look in your DIY bathroom renovation. With careful preparation, the right tools, and a keen eye for detail, you can transform your bathroom with beautiful and durable tile work.
Plumbing Basics for DIYers
Plumbing can seem daunting, but with basic knowledge and careful planning, you can tackle simple plumbing tasks in your DIY bathroom renovation. Understanding the fundamentals of plumbing is key to avoiding costly mistakes and potential water damage.
Shutting Off Water Supply
Before you start any plumbing work, always shut off the water supply to the fixture or the entire bathroom. This is a crucial safety precaution to prevent flooding and water damage.
Replacing Faucets and Showerheads
Replacing faucets and showerheads can be a relatively straightforward plumbing task for DIYers. Follow the manufacturer’s instructions carefully and ensure all connections are tight and leak-free.
- Use Teflon tape on threaded connections to create a watertight seal.
- Check for leaks after completing each connection.
- Consider using push-fit connectors for easy and reliable connections.
Understanding the basics of plumbing can empower you to handle simple plumbing tasks in your DIY bathroom renovation. Always prioritize safety, follow instructions carefully, and don’t hesitate to consult a professional for complex plumbing issues.
Painting and Finishing Touches
Painting and adding the finishing touches can transform your renovated bathroom, bringing it to life with color and personality. Attention to detail in this final phase is what elevates a DIY project from ordinary to extraordinary.
Choosing the Right Paint
Select a high-quality, moisture-resistant paint specifically designed for bathrooms. Opt for a semi-gloss or gloss finish for durability and easy cleaning.
Adding Decorative Elements
Incorporate decorative elements that reflect your personal style, such as mirrors, artwork, and plants. These finishing touches will make your renovated bathroom feel like a true sanctuary.
- Use painter’s tape to create clean and crisp lines.
- Apply multiple thin coats of paint for a smooth and even finish.
- Consider adding accent lighting to highlight key features.
Painting and adding the finishing touches are the final steps in transforming your bathroom into a personalized oasis. By selecting the right materials, paying attention to detail, and incorporating your personal style, you can create a bathroom that is both functional and beautiful.
| Key Point | Brief Description |
|---|---|
| 🛠️ Planning | Assess, budget, and create a detailed design plan. |
| 🧱 Tiling | Prepare surfaces and lay tiles with precision. |
| 💧 Plumbing | Handle basic tasks and ensure tight, leak-free connections. |
| 🎨 Painting | Choose moisture-resistant paint and add decorative touches. |
Frequently Asked Questions
▼
Savings vary based on project scope, but you can potentially save $2,000 or more by handling labor-intensive tasks like demolition, tiling, and painting yourself.
▼
Common mistakes include improper waterproofing, incorrect tile installation, neglecting plumbing codes, and underestimating project timelines and costs. Careful planning helps.
▼
Permit requirements vary by location and project scope. Generally, you need permits for plumbing, electrical, and structural changes. Check with your local building department.
▼
Ensure proper ventilation with a powerful exhaust fan, use moisture-resistant materials, and apply a waterproof membrane in wet areas. Regularly clean and dry surfaces.
▼
Hire a professional for complex plumbing or electrical work, structural changes, or if you lack the skills or time to complete the project safely and effectively.
Conclusion
A DIY bathroom renovation is a project that combines practical skills, careful planning, and attention to detail. By following these expert tips, you can transform your bathroom into a space that reflects your style and saves you money, making your home improvement dreams a reality.


