Turn Old Tires into Planters: Creative DIY Garden Upcycling
Turn old tires into stylish planters by cleaning, painting, and decorating them, creating unique upcycled garden features that are both eco-friendly and visually appealing, transforming waste into beautiful additions to your outdoor space.
Transforming discarded items into something beautiful and useful is a rewarding experience. This guide shows you how to turn old tires into stylish planters, a creative upcycling project that adds character to your garden while helping the environment.
Getting Started: Why Tire Planters?
Upcycling tires into planters is more than just a trendy DIY project; it’s a practical and eco-conscious way to repurpose waste. Let’s explore the numerous benefits of this creative endeavor.
Benefits of Upcycling Tires
Choosing to upcycle tires offers several advantages. Not only does it reduce waste, but it also adds a distinctive touch to your garden decor.
- Environmental impact: Reusing tires minimizes landfill waste and the environmental hazards associated with tire disposal.
- Cost-effectiveness: Instead of buying new planters, you can use old tires, saving money and resources.
- Creative expression: Tire planters offer a canvas for creativity, allowing you to customize them with paint, patterns, and various decorative elements.
- Durability: Tires are incredibly durable and can withstand various weather conditions, making them a long-lasting option for your garden.
These benefits highlight why transforming old tires into planters is a smart choice for any gardener looking to combine aesthetics with environmental responsibility.
Gathering Your Materials and Tools
Before diving into your tire planter project, it’s essential to gather the necessary materials and tools. Here’s a comprehensive checklist to ensure you’re well-prepared.
Essential Materials
Collecting the right materials is the first step toward creating stunning tire planters. These materials ensure that your finished planters are both durable and safe.
- Old tires: Source used tires from local tire shops, auto repair services, or even online marketplaces.
- Paint: Opt for exterior-grade acrylic or latex paint to withstand outdoor elements. Choose vibrant colors or earthy tones to match your garden aesthetic.
- Soil: Select a high-quality potting mix suitable for your chosen plants. Consider adding compost for extra nutrients.
- Sealant: Apply a sealant to the interior of the tire to prevent any potential leaching of chemicals into the soil.
Necessary Tools
Having the right tools on hand will make the process smoother and more enjoyable. These tools are essential for cleaning, cutting, and decorating your tire planters.
- Cleaning supplies: Use soap, water, and a scrub brush to thoroughly clean the tires. A pressure washer can speed up this process.
- Cutting tools: A utility knife or jigsaw can be used to cut and shape the tires, allowing for creative designs.
- Painting supplies: Include paintbrushes, rollers, and spray paint for applying color and decorative finishes.
- Safety gear: Always wear gloves, safety glasses, and a mask to protect yourself during the cleaning and cutting stages.
With these materials and tools at your disposal, you’ll be well-equipped to transform old tires into beautiful and functional planters.

Step-by-Step Guide: Creating Your Tire Planter
Now that you’ve gathered your materials, it’s time to get your hands dirty. Follow this step-by-step guide to transform old tires into eye-catching planters for your garden.
Cleaning the Tire
The first step in creating a tire planter is cleaning the tire thoroughly. This will ensure that the paint adheres properly and that the planter is free from dirt and debris.
- Prepare your cleaning station: Set up an area with access to water and a drain. Gather your soap, scrub brush, and pressure washer (if using).
- Apply soap and scrub: Use a generous amount of soap and scrub the tire vigorously with the brush, paying attention to the tread and sidewalls.
- Rinse thoroughly: Rinse the tire thoroughly with water, ensuring all soap residue is removed.
- Dry completely: Allow the tire to dry completely before moving on to the next step. This may take several hours, depending on the weather.
Cutting and Shaping the Tire (Optional)
If you want to add unique designs to your planter, this is the time to cut and shape the tire. Use caution and safety gear during this step.
- Mark your design: Use a marker to draw the desired shape on the tire. Popular designs include scalloped edges, floral patterns, or geometric shapes.
- Cut along the lines: Use a utility knife or jigsaw to carefully cut along the marked lines. Take your time and follow the lines accurately.
- Smooth the edges: Use sandpaper to smooth any rough edges, ensuring a clean and professional finish.
Painting and Decorating
Painting is where your creativity truly shines. Choose colors and patterns that complement your garden and reflect your personal style.
- Apply primer (optional): Applying a primer can help the paint adhere better and provide a more uniform finish.
- Paint the tire: Use a paintbrush, roller, or spray paint to apply the base coat. Allow it to dry completely before adding additional coats.
- Add decorative details: Use stencils, freehand painting, or other techniques to add decorative details. Consider using different colors and patterns to create a unique look.
- Apply sealant (optional): A clear sealant can protect the paint and add a glossy finish.
Filling and Planting
Once the paint is dry, it’s time to fill the tire with soil and plant your favorite flowers, herbs, or vegetables.
- Line the tire (optional): Use a liner, geotextile or plastic sheeting to prevent soil from escaping through the tire’s drainage holes.
- Add soil: Fill the tire with high-quality potting mix, leaving a few inches of space at the top.
- Plant your plants: Carefully plant your chosen plants, ensuring they have enough space to grow.
- Water thoroughly: Water the plants thoroughly after planting.
By following these steps, you’ll create a beautiful and unique tire planter that enhances your garden and showcases your upcycling skills.
Creative Design Ideas
To inspire your next DIY project, here are some creative design ideas for your tire planters. They range from simple painting techniques to more elaborate stacking and layering methods.
Monochrome Elegance
Go for a sleek, modern look by painting the tires in a single color, such as white, black, or gray. This minimalist approach can complement any garden style.
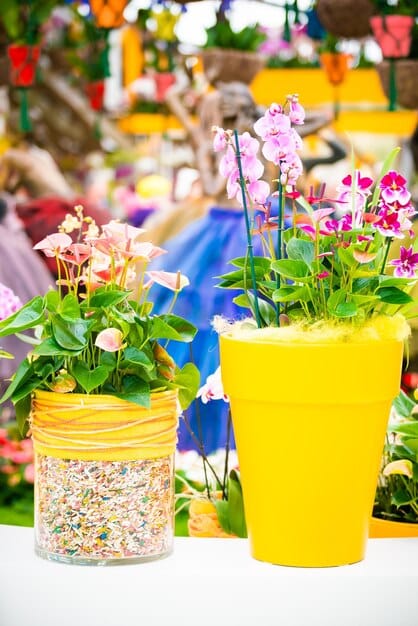
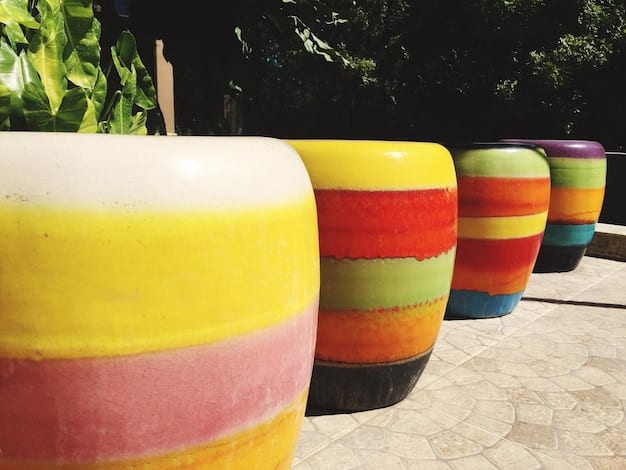
Vibrant Colors
Brighten up your garden with bold, eye-catching colors like red, yellow, and blue. You can paint each tire a different color or create patterns with multiple hues.
Stacked Tire Planters
Create a tiered effect by stacking multiple tires of different sizes on top of each other. This is perfect for creating a focal point in your garden or for growing plants with varying heights.
Hanging Tire Planters
Drill holes in the tire and hang it from a tree or pergola using ropes or chains. This adds a whimsical touch to your garden and saves ground space.
Mosaic Decoration
Adorn the tire with colorful mosaic tiles or broken pottery pieces. This adds texture and visual interest, creating a unique and artistic effect.
Planting and Maintenance Tips
To ensure your tire planters thrive, consider these planting and maintenance tips. Proper care will keep your plants healthy and your planters looking their best.
Choosing the Right Plants
Select plants that are well-suited to the size of the tire, the amount of sunlight your garden receives, and the local climate. Consider these options:
- Flowers: Petunias, marigolds, and geraniums are popular choices for their vibrant colors and easy maintenance.
- Herbs: Mint, basil, and rosemary thrive in tire planters and add a fragrant touch to your garden.
- Vegetables: Tomatoes, peppers, and lettuce can be grown in larger tire planters, providing fresh produce for your table.
Soil and Watering
Use a high-quality potting mix that provides good drainage and essential nutrients. Water regularly, especially during hot and dry periods, but avoid overwatering to prevent root rot.
Fertilizing
Fertilize your plants every few weeks with a balanced fertilizer to promote healthy growth and abundant blooms. Follow the instructions on the fertilizer packaging for best results.
Pest Control
Monitor your plants for pests and diseases. Use organic pest control methods, such as neem oil or insecticidal soap, to keep your plants healthy without harming the environment.
Seasonal Care
In colder climates, protect your tire planters from frost and freezing temperatures by moving them indoors or covering them with burlap. Prune and deadhead plants regularly to encourage new growth.
Safety Considerations
While transforming tires into planters is a fun and rewarding project, it’s essential to prioritize safety. Here are some important safety considerations to keep in mind.
Material Safety
Ensure the tires you use are free from any hazardous materials. Avoid using tires that have been exposed to toxic chemicals or pollutants.
Cutting Precautions
When cutting tires, always wear safety glasses and gloves to protect your eyes and hands. Use sharp, appropriate tools and cut in a well-ventilated area.
Painting Safety
Use non-toxic, environmentally friendly paints and coatings. Wear a mask when spraying paint to avoid inhaling harmful fumes.
Structural Integrity
Ensure the planters are stable and securely placed to prevent them from tipping over. If stacking tires, make sure they are properly secured to each other.
Environmental Responsibility
Be mindful of the environment by disposing of any waste materials properly and avoiding the use of harmful chemicals. Encourage others to upcycle responsibly.
| Key Point | Brief Description |
|---|---|
| ♻️ Upcycling Benefits | Reduces waste and adds unique style to your garden. |
| 🎨 Paint Choices | Use exterior-grade acrylic or latex paints for durability. |
| 🌱 Plant Selection | Choose plants suited to the tire size and sunlight. |
| 🛠️ Safety First | Always wear protective gear when cutting and painting. |
FAQ: Tire Planters
▼
It’s best to line the tire with plastic to prevent potential leaching. Opt for growing flowers or herbs if concerned about chemicals. Regular soil testing can ensure safety.
▼
Use exterior-grade acrylic or latex paint. These paints are durable and weather-resistant, ensuring your planter’s color lasts longer. Always apply in a well-ventilated area.
▼
Drill drainage holes in the bottom of the tire. Elevate the tire slightly using bricks or stones to allow water to escape freely, preventing root rot.
▼
Yes, stacking tire planters creates a tiered effect. Secure them together with strong adhesive or screws. Start with a larger tire at the base for stability, then fill the tires with soil.
▼
Use soap, water, and a scrub brush to remove dirt and debris. A pressure washer works well for thorough cleaning. Ensure the tire is completely dry before painting to achieve the best results.
Conclusion
Turning old tires into stylish planters is a fantastic way to combine creativity, sustainability, and gardening. With a bit of effort and imagination, you can transform discarded tires into beautiful and functional additions to your garden. This upcycling project not only enhances your outdoor space but also contributes to a greener planet.


