DIY Home Energy Audit: Cut Utility Bills by 15% in 3 Months (2025)

A DIY home energy audit, updated for 2025, empowers homeowners in the US to identify energy inefficiencies and implement simple, cost-effective solutions, potentially slashing utility bills by 15% within three months.
Want to save money on your energy bills? A **DIY home energy audit: Cut Your Utility Bills by 15% in 3 Months with These Simple Steps (Updated for 2025)** can help you identify where your home is losing energy and what you can do about it.
Why Conduct a DIY Home Energy Audit?
A DIY home energy audit is a great way to take control of your energy consumption and reduce your carbon footprint. It allows you to pinpoint areas in your home where energy is being wasted, so you can make targeted improvements.
Benefits of a DIY Audit
Performing the audit yourself offers significant advantages.
- Cost-Effective: Avoid the expense of a professional energy audit.
- Personalized Insights: Tailor the audit to your specific home and lifestyle.
- Educational: Learn about energy efficiency and conservation practices.
Let’s walk through the steps of conducting an effective DIY home energy audit.
Step 1: Gather Your Tools
Having the right tools will make the entire process much smoother. While some tools are essential, others are optional but can provide more detailed information.

Essential Tools
- Flashlight: Essential for inspecting dark areas like attics and crawl spaces.
- Measuring Tape: Needed to measure windows, doors, and insulation thickness.
- Notebook and Pen: For recording your observations and measurements.
Optional Tools for Enhanced Accuracy
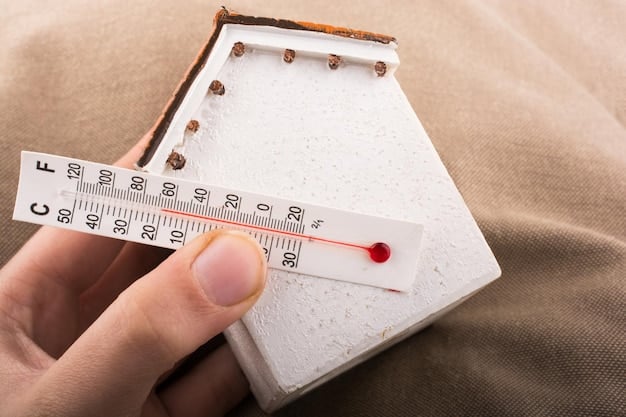
- Thermal Leak Detector: Helps identify temperature differences and air leaks.
- Kill A Watt Meter: Measures the energy consumption of appliances.
- Smoke Pencil: Useful for detecting drafts around windows and doors.
With your tools ready, you can start identifying areas for improvement.
Step 2: Inspect Windows and Doors
Windows and doors are often major sources of energy loss in homes. Air leaks around the frames can significantly increase your heating and cooling costs.
Check for Air Leaks
One easy way to check for air leaks is to hold a lit candle or a smoke pencil near the edges of windows and doors. If the flame flickers or the smoke moves, it indicates a draft.
Solutions for Drafty Windows and Doors
Here are a few measures to reduce energy loss around these openings:
- Weather Stripping: Apply weather stripping around door frames and window sashes to seal gaps.
- Caulking: Use caulk to seal any cracks or openings around window and door frames.
- Window Film: Apply window film to add an extra layer of insulation.
Addressing air leaks is a straightforward way to immediately improve energy efficiency.
Step 3: Evaluate Insulation Levels
Proper insulation is essential for keeping your home comfortable and energy efficient. Insufficient insulation can lead to significant energy waste.
Attic Insulation
The attic is one of the most critical areas to insulate. Check the depth of your attic insulation to ensure it meets recommended levels. In most US climates, you should have at least 10-14 inches of fiberglass or cellulose insulation.
Wall Insulation
Checking wall insulation is more difficult, but you can sometimes get an idea by removing an electrical outlet cover. Look for any visible insulation in the wall cavity.
Basement and Crawl Space Insulation
Insulating basement or crawl space walls can also help reduce energy loss. Rigid foam insulation or fiberglass batts are common choices for these areas.
Improving insulation levels will lead to long-term energy savings.
Step 4: Assess Your HVAC System
Your heating, ventilation, and air conditioning (HVAC) system is responsible for a significant portion of your energy consumption. Ensuring it’s running efficiently is key to reducing your bills.
Filter Maintenance
Regularly change your HVAC filters to ensure proper airflow. Dirty filters can restrict airflow, causing your system to work harder and consume more energy.
Ductwork Inspection
Inspect your ductwork for leaks. Seal any visible leaks with duct tape or mastic sealant. Leaky ducts can waste a significant amount of energy.
Professional Servicing
Consider having your HVAC system professionally serviced annually. A technician can identify potential issues and ensure your system is running efficiently.
Maintaining your HVAC system is essential for energy savings and comfort.
Step 5: Evaluate Appliances and Electronics
Appliances and electronics can be significant energy consumers, especially older models. Identifying and addressing inefficient appliances can save you money.
Energy-Efficient Appliances
Look for Energy Star-certified appliances when replacing old ones. These appliances are designed to use less energy and can save you money over their lifespan.
Unplug Electronics
Unplug electronics when they’re not in use. Many electronics continue to draw power even when turned off, known as “phantom load.”
Check Refrigerator and Freezer Seals
Ensure your refrigerator and freezer seals are tight. Leaky seals can cause these appliances to work harder and use more energy.
Taking these steps will help you reduce energy consumption from appliances and electronics.
Step 6: Lighting Efficiency Upgrades
Switching to more efficient lighting can significantly reduce your energy consumption. Traditional incandescent bulbs use much more energy than newer alternatives.
LED Lighting
Replace incandescent bulbs with LED bulbs. LED bulbs use up to 75% less energy and last much longer. While they may cost more upfront, they offer significant long-term savings.
Natural Light
Maximize the use of natural light. Open curtains and blinds during the day to reduce the need for artificial lighting.
Consider Smart Lighting
Consider installing smart lighting systems that allow you to control your lights remotely and set schedules. This can help you save energy by only using lights when needed.
By upgrading your lighting, you can make a significant impact on your energy bills.
| Key Point | Brief Description |
|---|---|
| 🔦 Find Air Leaks | Check windows and doors; seal gaps with weather stripping or caulk. |
| 🏠 Improve Insulation | Assess and upgrade insulation in the attic, walls, and crawl spaces. |
| 💡 Switch to LEDs | Replace incandescent bulbs with energy-efficient LED alternatives. |
| 🔌 Unplug Electronics | Unplug devices when not in use to eliminate phantom energy loads. |
Frequently Asked Questions
▼
It’s recommended to perform a DIY home energy audit at least once a year, preferably before the start of the heating or cooling season. This helps identify and address any new energy inefficiencies.
▼
The most common areas include windows and doors with air leaks, inadequate insulation in the attic and walls, inefficient appliances, and leaky HVAC ductwork. Addressing these can significantly improve energy efficiency.
▼
Yes, a DIY energy audit can lead to significant savings. By identifying and fixing energy inefficiencies, you can reduce your energy consumption and lower your utility bills, potentially by up to 15% within a few months.
▼
A thermal leak detector identifies temperature differences in your home, indicating areas of energy loss. While optional, it can be very helpful in pinpointing drafts and poorly insulated areas, improving your audit’s accuracy.
▼
Check the depth of insulation in your attic. For most US climates, aim for 10-14 inches of fiberglass or cellulose insulation. For walls, look for visible insulation when removing an electrical outlet cover. If in doubt, consult a professional.
Conclusion
Performing a **DIY home energy audit** is a proactive way to understand your home’s energy performance and take steps to improve it. By following these simple steps, you can save money, reduce your carbon footprint, and make your home more comfortable. Embrace these strategies and begin your journey towards a more energy-efficient and sustainable lifestyle.


