DIY Water Filtration: Clean Water Under $50
Creating a DIY water filtration system for under $50 is a practical solution to purify drinking water, utilizing readily available materials like plastic bottles, sand, gravel, and activated charcoal. This cost-effective method removes impurities and enhances water quality, making it a valuable skill for emergencies and sustainable living.
Access to clean drinking water is a fundamental need, but sometimes, whether due to emergencies, outdoor adventures, or simply a desire for greater self-sufficiency, we need to take matters into our own hands. That’s where a DIY water filtration system: purify your drinking water for under $50 comes in, offering a cost-effective and practical solution.
Why Build a DIY Water Filtration System?
Building your own water filtration system might seem like a task reserved for survivalists, but the truth is, it’s a skill with broad applications. Let’s explore the compelling reasons to consider this project.
Ensuring Water Security
In emergency situations like natural disasters or unexpected water supply interruptions, having a reliable source of clean water can be life-saving. A DIY filter provides a backup when conventional sources are compromised.
Cost-Effectiveness
Commercial water filters can be expensive, especially if you need them for multiple people or for extended periods. A DIY system uses inexpensive, readily available materials, allowing you to purify your water without breaking the bank.
- Promotes Self-Sufficiency: Building your own filter makes you less dependent on external systems.
- Reduces Plastic Waste: Reusing plastic bottles and other materials is environmentally friendly.
- Offers Peace of Mind: Knowing you can provide clean water for yourself and your family is empowering.
Ultimately, building a DIY water filtration system isn’t just about saving money; it’s about gaining independence and preparedness.
Understanding the Filtration Process
Before diving into the how-to, let’s clarify how a DIY water filtration system works. This understanding will help you build an effective and reliable filter.
The Layers of Filtration
A typical DIY filter consists of different layers, each playing a specific role in removing impurities from the water. These layers usually include:
The filtration process involves physical and chemical mechanisms to remove contaminants. Understanding these processes will allow you to select the best available materials.
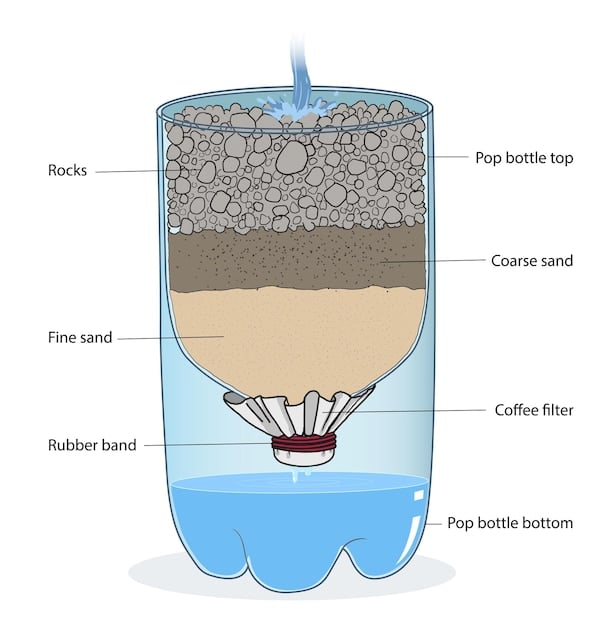
Sedimentation and Coarse Filtration
Gravel and coarse sand remove large particles like sediment, leaves, and debris. This is the first line of defense against visible impurities.
Each layer of the DIY filter system, from the initial coarse filtration to the final activated carbon purification, is crucial for creating safe and potable water.
- Fine Filtration: Fine sand filters out smaller particles like silt and clay.
- Adsorption: Activated carbon removes chemicals, odors, and tastes through adsorption.
- Disinfection (Optional): Boiling or using disinfection tablets can kill bacteria and viruses.
Understanding each layer’s function ensures you construct a filter that effectively removes various contaminants.
Gathering Your Materials
One of the greatest advantages of a DIY water filtration system is that it requires minimal materials. Here’s what you’ll need to get started, keeping the cost under $50.
Essential Components
These materials are easily sourced from local stores or even recycled from items you already have at home.
Acquiring the proper components, such as a durable plastic bottle, quality filtration media (sand, gravel, and activated carbon), and a clean collection container, ensures optimal performance of your DIY water filtration system.
Tools and Accessories
In addition to the main filtration components, you’ll need a few basic tools to assemble your system.
Choosing and Preparing Your Materials
Carefully select your materials to ensure they are clean and safe for filtering drinking water. Here are some tips:
- Plastic Bottle: Use a sturdy, food-grade plastic bottle. Clean it thoroughly with soap and water.
- Sand and Gravel: Wash the sand and gravel thoroughly to remove any dirt or debris. Boil them for 10 minutes to sanitize.
- Activated Carbon: Purchase activated carbon specifically designed for water filtration. Rinse it before use to remove any excess carbon dust.
By gathering the right materials and preparing them properly, you’ll be well on your way to creating an effective water filtration system.
Step-by-Step Construction Guide
Now that you have all your materials, it’s time to assemble your DIY water filtration system. Follow these step-by-step instructions for a successful build.
Preparing the Bottle
First, you’ll need to modify the plastic bottle to create a container for your filtration layers. This involves cutting and inverting the bottle.
This initial step is crucial for creating a proper housing for the filtration layers in your DIY system.
Layering the Filtration Materials
The order and thickness of the filtration layers are critical to the system’s effectiveness. Here’s a recommended layering approach:
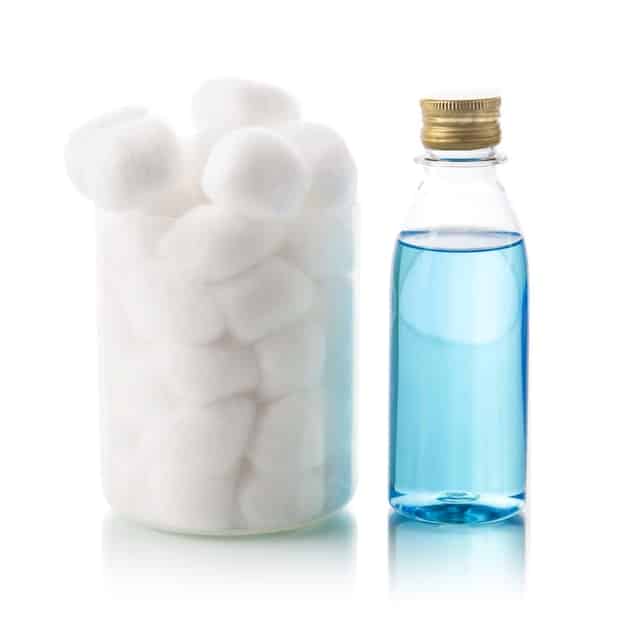
Begin by packing a layer of cotton balls or cloth at the bottle’s neck to act as a base filter, preventing larger particles from clogging the subsequent layers.
Testing and Refining Your Filter
Once you’ve assembled your filter, it’s essential to test its performance and make any necessary adjustments.
- Initial Testing: Pour water slowly through the filter and observe the output.
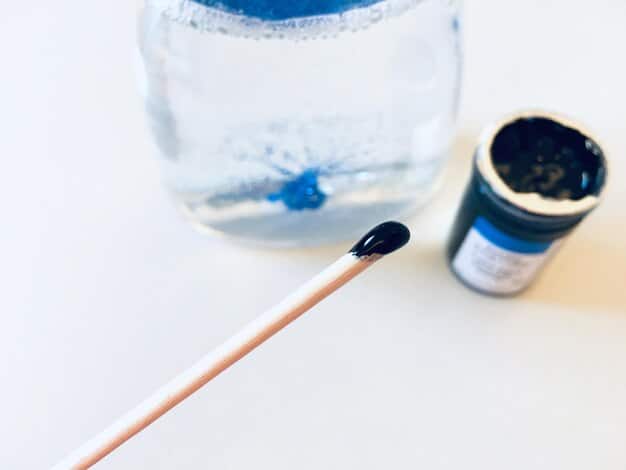
- Water Quality: Check for clarity, odor, and taste. If the water is still cloudy or has an unpleasant taste, consider adding more activated carbon.
- Troubleshooting: If the filter clogs quickly, reduce the amount of sediment in the input water or use a pre-filter (e.g., a cloth) to remove larger particles.
Refining your filter based on these tests will ensure it delivers the cleanest water possible.
Maintaining and Improving Your System
Building a DIY water filtration system is just the first step. To ensure its long-term effectiveness, proper maintenance is essential. Let’s explore how to maintain and enhance your system.
Regular Cleaning and Replacement
Over time, the filtration materials will become saturated with impurities, reducing the filter’s effectiveness. Regular cleaning and replacement are necessary.
Routinely replacing the filtration components of your DIY system, such as sediment filters, activated carbon, and membranes, ensures consistent and high-quality water purification for long-term use.
Enhancements and Upgrades
While a basic DIY filter is effective, there are several ways to enhance its performance and longevity.
By implementing system enhancements, such as UV disinfection or adding pre-filtration stages, you can significantly boost your DIY water filtration system’s capability to remove a wide range of contaminants and pollutants.
- Pre-Filtration: Add a pre-filter (e.g., a cloth or sponge) to remove larger particles before they reach the main filter.
- Multi-Stage Filtration: Incorporate multiple bottles, each with different filtration layers, for more thorough purification.
- UV Disinfection: Use a UV light to kill bacteria and viruses in the filtered water. (Note: This requires a power source.)
Enhancements like these can significantly improve the quality and safety of your filtered water.
In summary, a DIY water filtration system can supply clean water affordably, playing a vital role during emergencies or outdoor excursions.
| Key Point | Brief Description |
|---|---|
| 💧 DIY Filtration | Cost-effective way to purify water using basic materials. |
| 🧪 Material Layers | Sand, gravel & charcoal filters debris, sediment, and odors. |
| 🛠️ Construction Tips | Clean layers, proper layering order, and bottle prep are key. |
| 🔄 Maintenance | Regular cleaning/replacement ensures long-term effectiveness. |
Frequently Asked Questions
▼
A DIY water filter primarily removes sediment, debris, and some chemicals. It may not eliminate all bacteria or viruses, so it’s best for relatively clean sources or as a pre-filter before boiling or disinfection tablets.
▼
The frequency depends on water quality and usage. If the water flow slows or the taste/odor changes, replace the materials. Sand/gravel can be cleaned; activated carbon should be replaced every 1-3 months.
▼
While suitable as a backup or for short-term needs, consider more robust commercial filters for long-term use. DIY filters require frequent maintenance and may not provide the same level of purification.
▼
Granular activated carbon (GAC) made from coconut shells is ideal. It has a large surface area for effective adsorption of impurities and is specifically designed for potable water filtration.
▼
Ensure you’re using high-quality activated carbon. You can also add a layer of ceramic filter or run the water through the filter multiple times to further reduce odors and improve taste.
Conclusion
Building a DIY water filtration system: purify your drinking water for under $50 is a rewarding project that empowers you to take control of your water security. With the right materials and a little effort, you can create a reliable source of clean water for emergencies, outdoor adventures, or simply for greater peace of mind.


